 Save to Pinterest
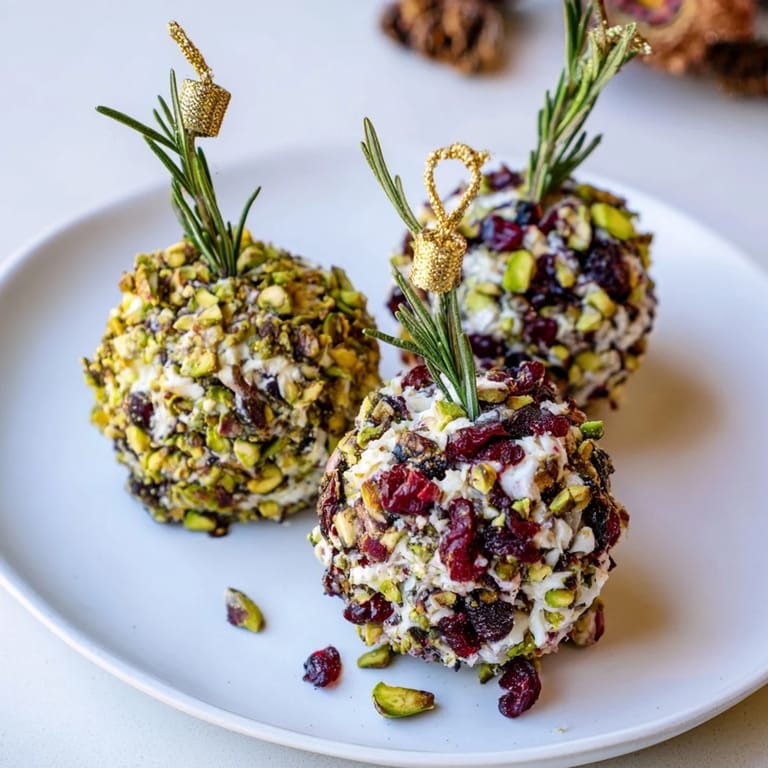
 I'll never forget the year my sister-in-law brought these gorgeous cheese ball ornaments to our family Christmas gathering. They were so stunning hanging there in little colorful clusters that I almost didn't want to eat them—almost being the key word. One bite and I was hooked. The creamy, tangy cheese mingling with that pop of pistachios and cranberry? I went straight to the kitchen and demanded the recipe. Now every December, making these becomes a quiet meditation in my kitchen, a moment where the holiday spirit somehow lives in the rolling of cheese and the careful placement of a rosemary sprig.
I remember making these for the first time at my mom's house, and my nieces got so excited that they started arranging them on the platter before I'd even finished rolling. They called them 'cheese ornaments' and suddenly that became the name we use in our family. Now whenever I serve them, someone always says, 'Oh, you made the ornaments!' and I'm transported right back to that moment of pure kitchen joy.
Ingredients
- Cream cheese: This is your base, and it needs to be softened so it blends without being streaky or lumpy—take it out of the fridge at least 30 minutes before you start, and your life becomes exponentially easier
- Sharp cheddar and mozzarella cheeses: The sharp cheddar brings that tangy bite that makes people go 'wow, what is that flavor?' while the mozzarella adds creaminess and helps everything hold together beautifully
- Fresh chives: This is what separates good cheese balls from the ones people actually remember—don't skip them or use the dried stuff
- Dijon mustard: Just a tablespoon, but it's the secret that elevates this from basic to 'did you go to culinary school?' territory
- Garlic powder: A gentle hand here goes a long way; you want it to whisper, not shout
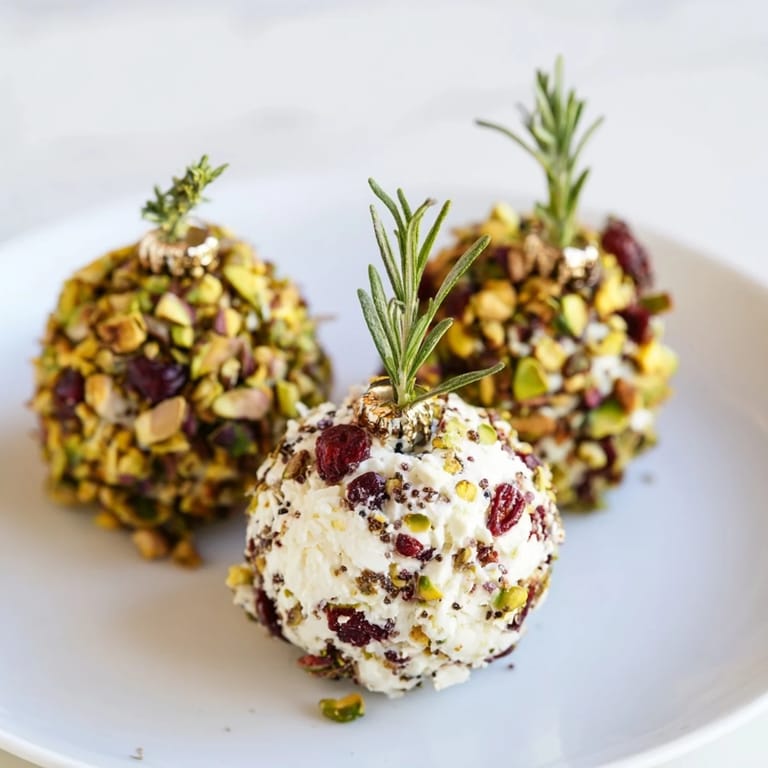
- Pistachios, dried cranberries, poppy seeds, parsley, roasted red peppers, and walnuts: These are your ornament 'colors'—choose at least three or four for a gorgeous variety that catches the eye and gives people choices
- Rosemary sprigs: Look for ones that have a natural curved shape at the top; they're not just decoration, they're the little hook that makes these feel like actual hanging ornaments
Tired of Takeout? 🥡
Get 10 meals you can make faster than delivery arrives. Seriously.
One email. No spam. Unsubscribe anytime.
Instructions
- Make your cheese canvas:
- In a bowl, combine your softened cream cheese with both shredded cheeses and mix with a spatula until you don't see any streaks of cream cheese—it should feel smooth and almost cloud-like. Add your chives, Dijon mustard, garlic powder, salt, and pepper. Mix again until everything is perfectly incorporated. Take a moment to taste it on a finger; this is where you adjust seasoning, because the coatings won't do much to change the flavor.
- Portion into ornaments:
- Using a measuring spoon or small ice cream scoop, divide your mixture into 12 roughly equal portions. Roll each one gently between your palms into a smooth, compact ball—this is meditative work, so don't rush it. The smoother you can make them, the better your coatings will cling.
- Create your color palette:
- Pour each coating ingredient into its own shallow bowl—a soup bowl works perfectly. You're going to roll your cheese balls in these, so give yourself enough room to work. The key is creating distinct, visually separate clusters that look like different ornament styles.
- Dress your ornaments:
- Roll 3 or 4 cheese balls in each coating, pressing gently so the coating adheres evenly. If a coating isn't sticking well, very lightly dampen the cheese ball's surface with your fingertip—that bit of moisture acts like glue. Work methodically so you end up with multiple balls in each color variation.
- Arrange into clusters:
- On your serving platter, group 3 or 4 cheese balls together, clustering them tight so they look like they're hanging as one unit. This is the magic moment where they transform from individual cheese balls into actual ornament clusters—you'll understand the vision once you see them arranged.
- Add the finishing touch:
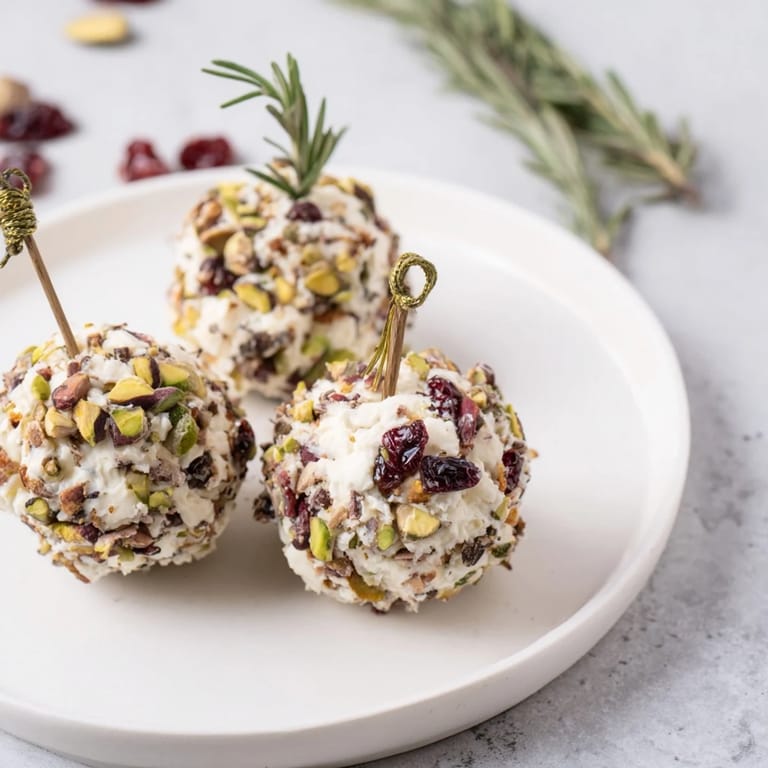
- Insert a rosemary sprig into the top of each cluster, angling it slightly so it looks like a real ornament hook. Step back and admire your work—you've just created something that's as beautiful as it is delicious.
 Save to Pinterest
 There's a moment right after you've clustered everything and added the rosemary hooks when you just stop and stare at what you've made. These aren't just appetizers anymore—they're a little edible art installation that says 'I put thought and care into this gathering.' That's when I know the holidays are really here.
Making Them Your Own
The beauty of this recipe is that it's genuinely customizable. I've made versions with sun-dried tomatoes mixed right into the cheese base, and another version where I added minced roasted garlic because that's what my crowd loves. The coatings are where you can really play—don't feel locked into pistachios and cranberries just because that's traditional. I've used everything from finely chopped fresh dill to toasted pine nuts to crushed candied ginger. The framework stays the same, but your version becomes uniquely yours.
Timing and Make-Ahead Magic
One of the reasons I return to this recipe year after year is that it fits perfectly into holiday prep chaos. You can make the cheese mixture up to 2 days ahead and store it covered in the fridge. You can roll the balls the day before and keep them in a container. The coatings can be prepped and arranged in bowls hours in advance. The only thing you should do fresh is the final assembly and adding the rosemary sprigs—this ensures they look pristine and the rosemary stays vibrant green rather than wilting.
Serving Suggestions and Pairings
These deserve to live on a beautiful platter, ideally with some festive greenery tucked around them—actual rosemary branches or fresh holly leaves if you can get them. The contrast of the cheese colors against a dark slate or wood platter is absolutely stunning. Serve alongside quality crackers, crostini, or thinly sliced baguette, though honestly, they're equally delicious eaten straight with nothing else. I've found that guests often pick these up bare-handed, so making sure your platter has plenty of space and maybe some small napkins nearby is the mark of someone who's thought things through.
- Arrange them a few hours before your guests arrive so they're cold and hold their shape beautifully
- Keep them in a cool spot until serving—they can soften if the room is too warm
- Consider making a few extra because they go faster than you'd expect
 Save to Pinterest
 These cheese ball ornaments have become my favorite holiday tradition to make, the one thing people ask about and expect to see on my table. There's something about creating something this beautiful and delicious that reminds you why we gather in the first place.
Recipe FAQs
- → How do I keep the clusters fresh before serving?
Refrigerate assembled clusters until serving time to maintain firmness and freshness, covering them tightly with plastic wrap.
- → Can I prepare these cheese clusters ahead of time?
Yes, prepare cheese balls and coatings separately, then roll and assemble just before serving for best texture and appearance.
- → What coatings work well for variety?
Finely chopped nuts, dried cranberries, poppy seeds, parsley, roasted red peppers, and walnuts offer colorful and flavorful options.
- → How does the rosemary sprig enhance the clusters?
The rosemary sprig acts as a decorative hook, providing an aromatic, festive touch reminiscent of holiday ornaments.
- → Are there any dietary considerations for this dish?
This dish is vegetarian and can be gluten-free if served with gluten-free crackers. Be aware of dairy and nut allergens in ingredients.
- → What is the best way to serve these clusters?
Arrange clusters on a platter alongside assorted crackers or sliced baguette for easy serving and pleasing presentation.